Expert Support
Call 020 8500 1188

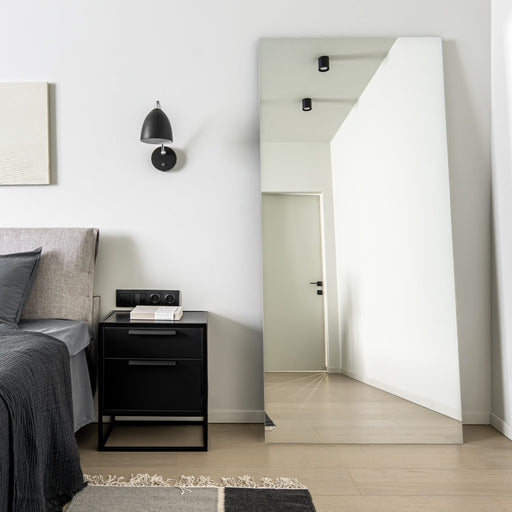
If you want an area to feel more open and brighter, a frameless mirror will make a stunning addition to any room in your home or business space.
Not only do they lend a touch of elegance and create the illusion of more space, but frameless mirrors are also surprisingly straightforward to install.
In this guide, we will explain how to attach a frameless mirror to the wall using two popular methods: mirror adhesive and wall mounting plates.
When it comes to hanging a frameless mirror, there are two primary options:
When using glass mirror adhesive, you can simply stick the frameless mirror directly to the wall surface. This method offers a clean look with no visible hardware and is perfect for a more permanent placement.
However, removal can be difficult, which is why you’ll need to get the position right the first time, as you can’t adjust the mirror once it's stuck in place.
A mounting kit uses barely visible clips or mounting plates to mount a frameless mirror to a wall. These provide a secure hold and are adjustable, which is ideal if you plan on changing the position of the mirror in the future.
Each method has its benefits, so whichever option you decide to use, we offer both mirror adhesive and a mirror mounting kit in our glass fittings shop.
For a seamless look, here’s how to hang a frameless mirror with adhesive:
Use a tape measure to identify the exact location on the wall where you want to hang the mirror, and mark the perimeter lightly with a pencil.
Make sure the edges are level, and there is enough room to use the brace below.
If the wall is painted, use medium or fine-grit sandpaper to lightly sand the area behind where the mirror will go, staying within the pencil lines.
Scuffing the paint will provide a better grip to ensure the adhesive bonds well.
Once the surface is sanded and prepped, use a paint roller to apply a primer to the sanded area and let it dry according to the supplier’s instructions.
Adding a suitable primer is also essential for better adhesive performance.
Place and secure a temporary brace at the bottom edge of the outline, which will help to support the mounted mirror while the adhesive sets on the back.
The temporary mounting brace can be a scrap wooden board, for example.
Apply the adhesive on the back of the mirror, using either evenly spaced blobs or a continuous wave pattern to cover the entire area effectively.
Use one 290ml tube per square metre, and don’t go too close to the edges.
Using the temporary brace to stabilise and position the mirror, carefully align the panel and gently but firmly press the mirror against the wall surface.
You may have a few seconds for small adjustments before the glue starts to set.
Ensure that your paint roller is clean and dry, then run the roller across the face a few times to press the mirror more firmly against the wall.
This extra pressure should ensure a firm bond between the wall and the mirror.
In addition to the mounting brace, you can place painter's tape over the mirror to hold it securely in place while the adhesive dries overnight.
Run strips of painter’s tape to the top, left, and right edges for extra support.
Once the adhesive is dry, remove the temporary brace and painter’s tape.
It can take between 24 and 48 hours to cure, so be sure to wait the amount of time advised in the instructions that came with your mirror adhesive.
Perfectly frameless, with no hardware on display, your new mirror is ready to serve as a decorative and practical feature in your home or workspace.
For those who would prefer to use plates over glue, here's what you need to do:
Mark the position of the mirror on the wall by holding it against the wall and using a pencil to lightly sketch around the mirror edges.
You can then use painter’s tape to clearly mark the perimeter on the wall, using a level to make sure the strips of tape are horizontally and vertically even.
Place the mirror on a level and clean surface (e.g. on glass felt) with the reverse side facing upwards, so you can prepare it for the plate adhesive tape.
Clean the reverse side of the mirror thoroughly with a silicone-free glass cleaner.
Lay the mounting plates where you need them to go, and then mark the position of the plates on the reverse side of the mirror with a pencil.
Both plates should be positioned 10cm from the upper and lateral edges, so you can accurately line up their positions with the wall mounts.
Remove the protection film and spread the spacers across the back of the mirror to help prevent the glass panel from bending after mounting.
Then remove the protection film from the back of the mirror plates and press each plate into position, pressing firmly for around 10 seconds.
Bear in mind that once the plates are bonded, you can’t reposition them.
If you’ve purchased mounting plates only, you’ll need to attach your own mirror hooks to the wall. You can do this by measuring and marking the spots where the plates will hang, drilling into the wall, and inserting screws.
If your kit comes with eccentric discs and press buttons, you must follow the kit’s instructions closely to ensure you drill the holes in the correct positions and fix the components into the wall securely with the right types of screws.
Allow the mirror plates to rest for at least 30 minutes, then press them firmly to the mirror once again before hanging the mirror on the discs or hooks.
It is safer for two people to lift the mirror together, tilt it towards the wall, and lower it gently onto the hooks or upper discs until the plates catch and hold.
For eccentric discs and press buttons, remove protective films before hanging the mirror on the discs and pulling it gently downwards onto the buttons.
The mirror hook method is less adjustable, but if you’ve used eccentric discs, you can turn the discs to adjust the height and reposition the mirror horizontally.
This method typically allows up to 4mm of adjustment, and by gently pulling and lifting it, the mirror can be demounted just as easily as with regular hooks.
Whether you decide to keep your mirror frameless or add a decorative frame later on, this mounting style gives you the freedom to change your mind.
Wondering how to mount a frameless mirror on the wall without nails or glue? The old-fashioned way of hanging a frameless mirror involves drilling holes in the corners for screws to go through, but this leaves the screws visible.
Our mounting kits help to hide the screws, but if you want to hang a frameless mirror without drilling at all, this might not be the best option for you.
The alternative is, of course, simply applying mirror glue on the back so you can stick the mirror straight onto the wall. If you’re concerned about wall damage, though, this method may also be unsuitable for you.
The less permanent choice is using adhesive strips that come away from the wall more easily and with less damage to the surface, which are popular for renters.
However, this isn’t recommended, as temporary adhesive strips are not as secure, increasing the risk of your mirror falling off the wall and breaking. To get the best value out of your investment, use one of the two methods in this guide to make sure your mirror hangs securely for a long time.
Whether you require further tips on hanging your frameless mirror or you want to order a custom, made-to-measure frameless mirror, our team can assist you.
For more information on our products or to discuss your specific needs, please contact us, and be sure to check out our full range of frameless mirrors online.
Frameless Free Standing Leaner Mirror - 6mm with polished edges - Silver (also available in Grey, Bronze or Antique Bronze) All glass manufac...
View full detailsFrameless Free Standing Arch Leaner Mirror - 6mm with polished edges - Silver (also available in Grey, Bronze or Antique Bronze) All glass ma...
View full details6mm Silver Rectangle and Square Mirror If safety backing is selected, drill holes must be added for mounting as adhesive glue is not suitable fo...
View full details6mm Silver Round Mirror If safety backing is selected, drill holes must be added for mounting as adhesive glue is not suitable for this type of ...
View full details6mm Silver Pebble Mirror If safety backing is selected, drill holes must be added for mounting as adhesive glue is not suitable for this type of...
View full details